Been working on the lower aft cowl for the last couple days and completed it today. Tomorrow I will begin fitting the lower nose bowl. I removed the fiberglass nose bowl and repaired a number of areas. Someone had cut a 3 holes to access items without removing the cowl. I decided to patch all these and add screws to the air intake for the heaters making the cowl easy to remove. I started by repairing the cutouts where the exhaust pipe enters the cowl. With the "C" series Continental installed the exhaust has to be lowered to clear the oil screen housing. Someone had hacked open the holes and just left the rough edges so of course it cracked in several places. I cleaned up the existing holes as best I could and installed a doubler plate of 032 on both sides. Initially I used AN 470 rivets but it looked like shit so I went ahead and countersunk them . Here is the left side, I left a 470 rivet at the end of the crack.
I did not have the tooling to do the rolled edge, so this is what I ended up with. Some great videos on YouTube on bead rolling if your interested. I think this will be OK for the beater Cub!
The right side needed a little more work because of a previous repair at the forward pin location. I'm not sure why they lowered this pin but I don't need this change to fit my upper cowl. I just extended the inside patch to encompass this location. Looks sorta like an Aircam in this shot!
Here it is all riveted up, there were two cracks in this side.
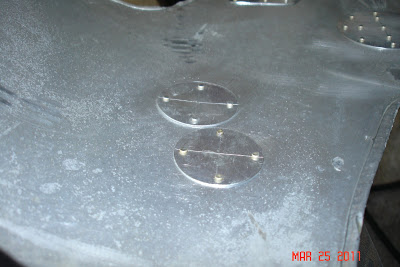
With a nice thick coat of paint it should look OK for the beater Cub! I then started on the 3 extra holes in the bottom. With my luck , none of them lined up with the gascolator, so I had to do some patching. There were 3 holes, one I assume for the gascolator, another for the oil quick drain, another I'm not sure, and two worn areas where something chafed through. The two holes at the aft edge I repaired with one patch , then cut a new hole to fit my gascolator installation. I cut the existing holes round , then fitted plug patches with an internal doubler. I then cut a new hole to line up with my gascolator. Here are some shots, since this area is curved I used a lot of clecos.
Here it is after riveting, I managed to squeeze all but two of these . I think it came out pretty good.
Then using the same plug patch method , I repaired the oil quick drain hole. In my world if your changing the oil, it's time to inspect the rest of the engine. The cowl needs to come off anyway.
At this location I had to drive all the rivets, while not as nice and uniform as the squeezer , it still came out OK.
At the two chafed areas ,I decided to try a different approach and use a internal patch and a little JBWeld to fill the damaged spots. This will be a test to see how well it holds up. It looked like a piece of SCAT hose rubbed inside the cowl, one spot was worn through and the other was paper thin. I made two round patches due to the curvature of the skin. Here is the worn through spot you can see the other spot just below the patch.
I used thin plastic from a sandwich bag as a release agent and held it in place with masking tape. I applied a thin coat of JBWeld epoxy and then riveted the patch in place. Here are some pictures to illustrate. The tape minimizes the squeeze through and resulting mess and cuts down on sanding.
Since the other worn spot did not go all the way through , I just used the epoxy to fill the void under the internal patch. I will sand this smooth after it dries a couple days.
That completes the repairs to this section, now I just have to fit up that lower nose bowl.!


No comments:
Post a Comment